ILLUSTRATION, MURAL DESIGN
"Spring Warblers" Utility Box Mural
In August 2025, I was selected by the Mississauga Arts Council to paint a Bell utility box in the Lorne Park neighbourhood of Mississauga.
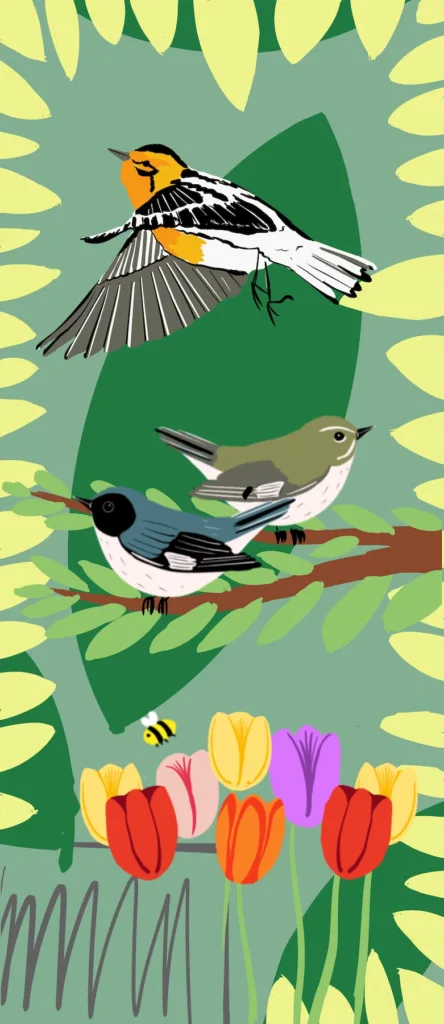
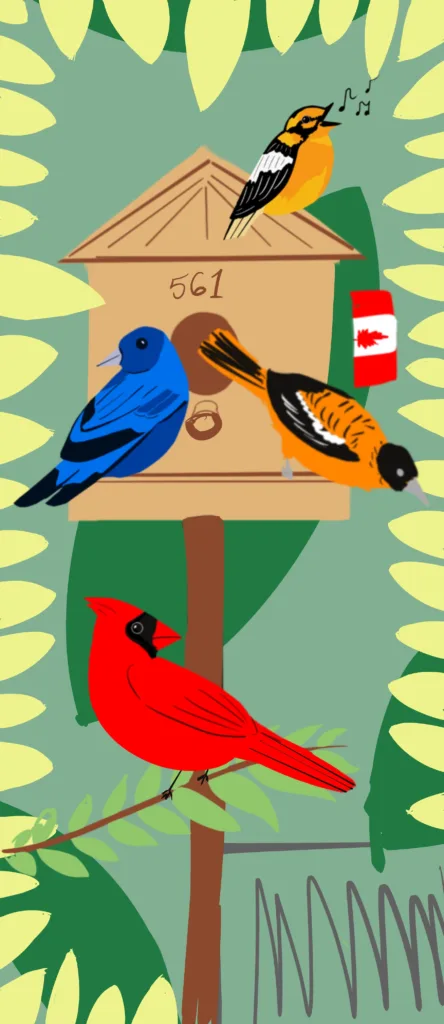
“Spring Migrants” celebrates the beautiful, vibrantly coloured migratory birds that pass through Mississauga during the change of the seasons. From the bright red Northern Cardinal, which holds many spiritual meanings, to the much more elusive Blackburnian Warbler, the diversity of the featured birds acts as a representation of the diversity of Mississauga. The simple, leaf-themed backdrop, represents growth and new beginnings, as well as a dedication to preserving wildlife and green spaces in our quickly growing city. The simple style of the piece makes the vibrant colours the star of the artwork itself.
Client
Mississauga Arts Council
Murals with MAC
Medium
Acrylic Paint on Metal
Scope
Concept Design
Concept Revisions
Mural Painting
Design Process
Initial Concept Submission
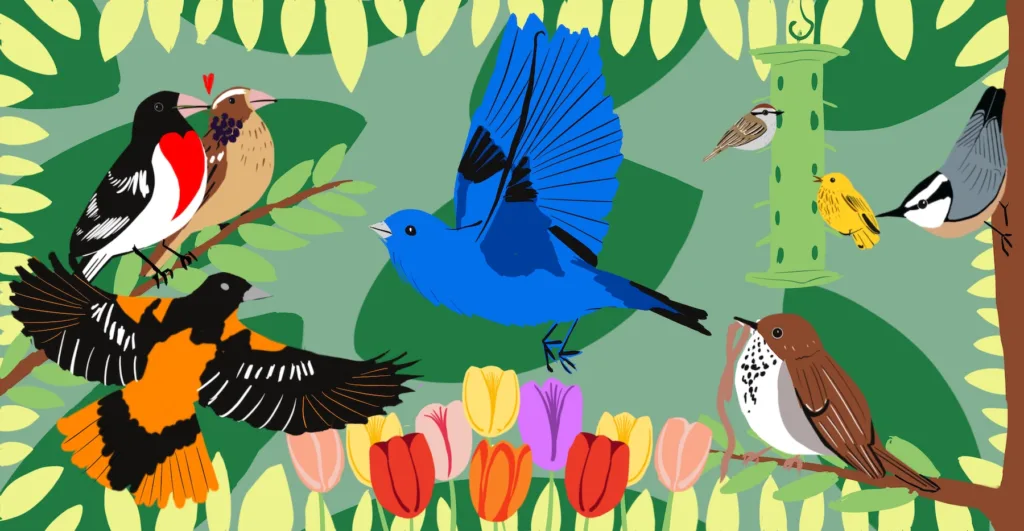
Below is the initial design concept I submitted to MAC based on their Request for Proposals, featuring 10 different species of birds that either live in the area or migrate through in the springtime.
Refined Concept
After feedback from MAC regarding adding movement to the piece and having the birds in motion as well as playing with more depth, I submitted the new refined concept below. At this point, there had been a change in location and the new location was to only have three sides of the box painted, so I had to adjust my design accordingly to fit the space. Once I was given the go-ahead, I was able to begin painting.
The Painting Process
As someone who works primarily digitally, the painting process was what frightened and excited me most about this project. After several trips to the art supply store and to Home Depot, and after reaching out to some lovely and talented muralists in the GTA for their best tips and tricks, I began the painting process.
Step 1: Prep, Prime, and Base Coat
Before I could begin painting the box I needed to clean it. As it was in a shady area under a large tree, there were lots of dead leaves and a plethora of ants and spiders that had made their home on/around the box. I used an eco-friendly cleaning spray to clean it with chamois rags and sanded down any rusty areas as best as I could. After that, I put two coats of an anti-rust primer base on. Because the box was dark brown and I was planning on putting a light green colour on, I wanted to ensure that the brown didn’t show through.
The following day, I went back to the site and put the base coat on, a lovely light green colour called Mossy Bench.
Step 2: Doodle Grid
After the box was painted with the base coat, I went in with chalk markers and started to create a doodle grid. This is one of several ways to transfer a design onto a surface. I had never done it before, and it looked a bit wild until I started painting, but it was very helpful to transfer the design onto the box!
Once the doodle grid was on, I took photos and overlaid my design on them to be able to transfer it properly.
For future reference I would likely just use chalk and not chalk markers as I did have to paint over some of the chalk marker lines with the base colour before I finished the piece.
Step 3: Let's Paint!!
Now for the fun part: actually painting. I mainly used heavy body Golden Artist Acrylics and some leftover Amsterdam acrylic paint I had from a project from my time at Humber. I bought lots of my paint on clearance and mixed it to get all of the colours I needed for the design. The heavy body acrylics were definitely interesting to get used to working with.
The Final Product
After the box design was finished, I went over the entire thing with an anti-graffiti coat that was provided to me by the Arts Council (this is to ensure the mural does not get defaced). Then, it was all done! I had so much fun with this project and it was definitely an incredible learning experience for me. I can’t wait to paint more. 🙂


